
If Only
This commercial is 4 storylines interwined capturing the moments just before each person decides to step away from taking their life. The purpose is to raise awareness for suicide prevention in order to let everyone know that there is always a brighter side "If Only" they sought help for themselves.
Approaching this project my aim was to be more active in pre-production in order to create a more cohesive vision and have more influence over the frame. The best situation I could be in is knowing my options on the day of the shoot with what I could change in the frame and how it would potentially look. For this to happen we had multiple location scouts, visiting at least 2 possible locations for each scene and discussing the pros and cons.
This project was shot on my Blackmagic Production camera in 4K ProRes 422. Additional equipment was only limited to whatever I personally had for previous projects. No extra lights and equipment were brought in except for a c-stand. For the most part I had to make the most I could out of available light and 2 Aputure 672s LED panels. Knowing this limitation - location scouting was super important as I had to approve locations that I knew would give me flexibility. We had to scout locations that made it easy to access and could double up for several scenes as there were over 20 separate locations for the film and it would be costly and timely to travel to 20 individual locations. Fortunately we managed to agree on several locations that we could fit 4-5 scenes in with smart set dressing.
No storyboards were drawn for this project, just a shot list and trial and error on set. This breakdown will focus on the shots that had a more interesting setup as well as my favourite shots and how I got them.
Neville


Neville's story is about a father that misses the past connection he had with his family when they were younger and in love. His character is of a drug dealer that is considering hanging himself because he has lost the passion of providing for his family. We chose green to be his colour scheme as it represented a sickly condition, possibly due to his drug use. In his earlier life the green pops out fully saturated and bright while in the present day in the garage his clothing and the walls are more subdued.
The Garage

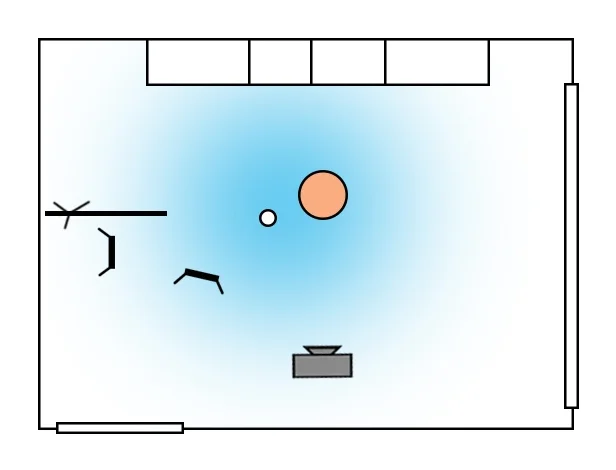
A - Garage Floorplan
One source of light was a fixed naked light bulb in the middle of the ceiling which I wrapped in 1/4 CTB to give a colder feel. Looking at the floorplan, I purposely placed the actor behind the lightbulb so that the light would act as a key on his right side. 1 LED was bounced off the wall and became my adjustable key light, the other was aimied at the ceiling in front of the actor too to bring up the ambient in his face on both sides. A cutter was made from a black plastic bag and used to block some light from hitting the background in the wide shots but for the one CU seen above-middle it was brought closer to the actor's left side to increase the contrast in the face (set up on the right).
In picture B we dressed the wall with boxes and items that were originally in the garage.

B - Set up for the front CU.
The Wedding
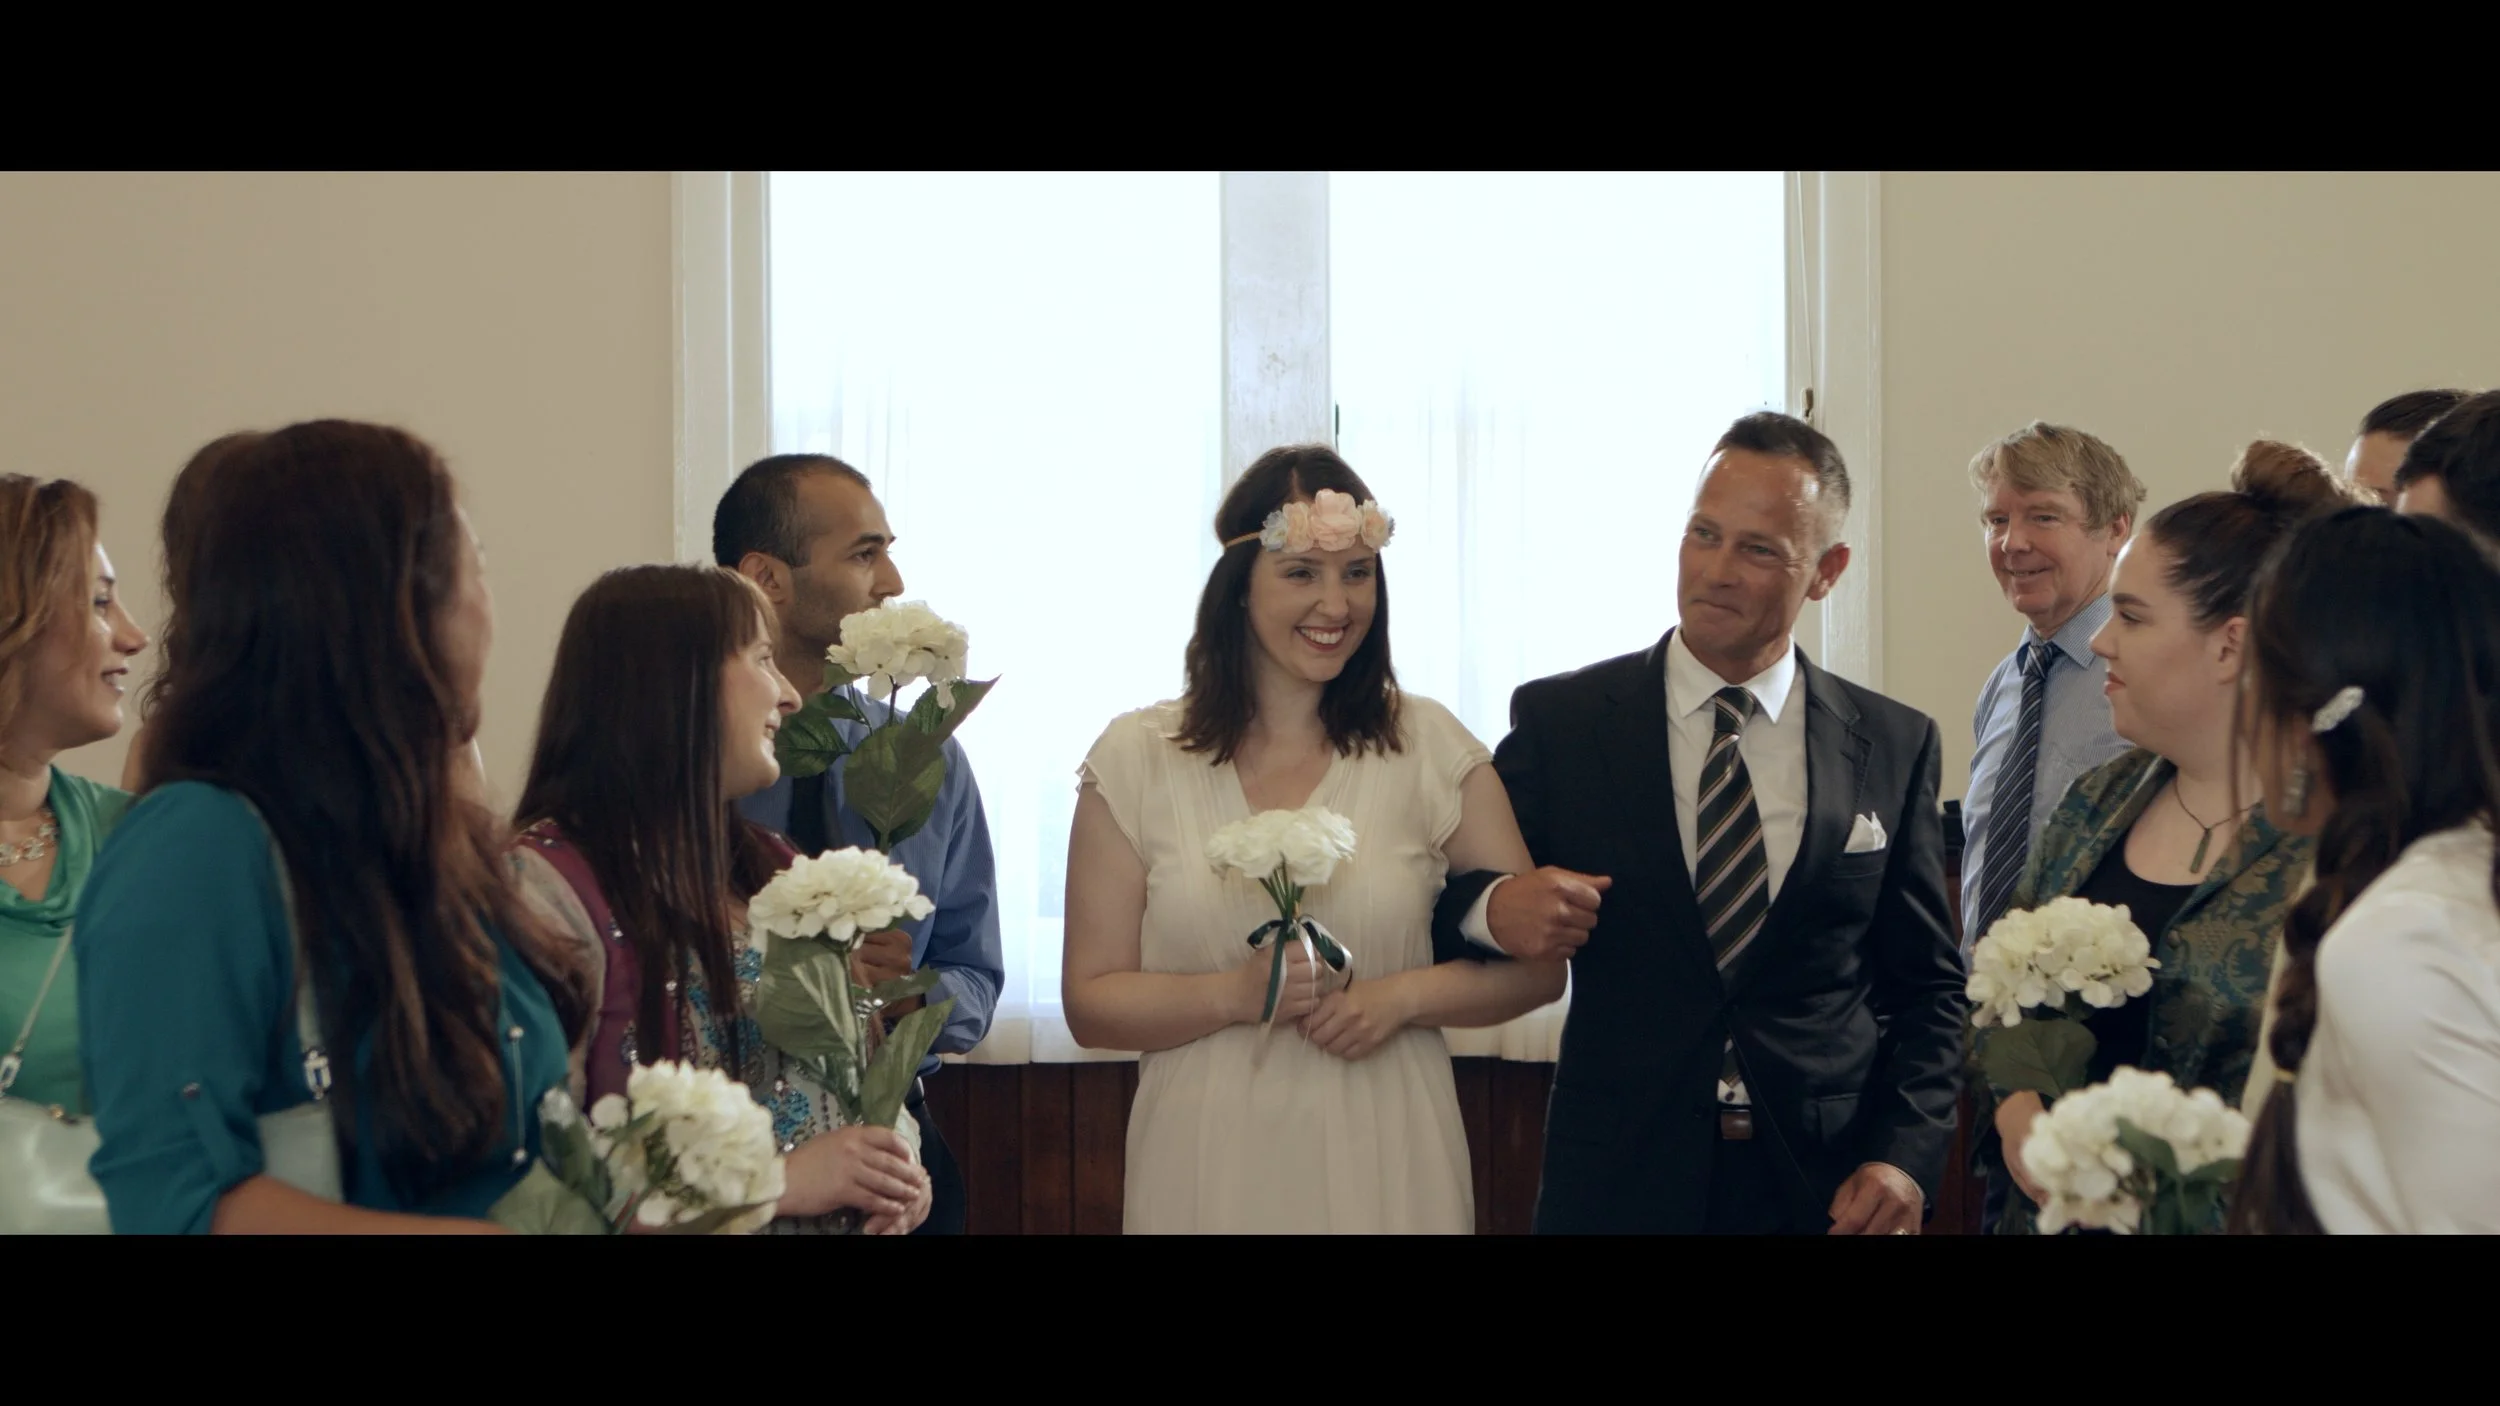

I was perhaps the most nervous approaching this scene for the shoot as I had not seen the location before nor was the number of extras and props confirmed for the day until we arrived. My concern was not having sufficient equipment to create a cheerful and bright atmosphere that you would except for a celebration. We had about 12 extras turn up to play the guests and were just lucky enough to fill the frame with bodies to make the receptin look big.
The set had 5 large windows which I opened up to get as much sunlight in the room as possible. I had a 2K LED light (3) bounced off the front wall to key the actors and bring up the ambient light in the room. Despite having large open windows I still used 2 LED lights (1/2) to act as a backlight and kicker to reach those standing further away. LED light 1 was gaff-taped to the top of the window to give that extra punch. I decided to blow out the back window to add more whiteness and brightness into the frame. It also helped to hide the boring exterior. The whole scene only took 2 hours to set up and shoot despite having the biggest cast of the production.
Hamish


The colour palette for Hamish was orange. There was nothing particular about choosing the colour for this character but it luckily worked out that we could contrast it's use in the present as a depressed state and in the future as a familial warmth. Production day for this particular scene was as skeleton as you could make it, the crew and their family members took the roles as Hamish's family during the Christmas dinner but as we didn't intend to show the faces of the family the scene worked out as intended.
The War

I was skeptical about how realistic we could get this scene to be. We didn't have extras, prop weapons or smoke machines to create a realistic war zone for the camera. My direction was to keep it close and personal so that we did not see the emptiness of the field around us. The idea was to use sound effects to sell the idea that Young Hamish was in a war but I wanted extra visual elements to enhance the scene. This came about by getting gravel and sand and tossing it up into the air and having it land around the actor. This really brought the scene together.
The Christmas Dinner

1. Hamish CU Floorplan
1. To get the mood and dimly lit atmosphere for Hamish's scenes all visible light sources were blocked out with curtains to prevent light spillage into the room except for a parting by the main windows in order to get proper exposure. A small reading light by the chair was our key light and was directed towards the actor's hands, not directly at him. The curtain acted as a soft bounce and allowed me to key Hamish from the side. I also had 2 LED's filling in the shadows. One was positioned in front of the actor and bounced against the ceiling to lift the shadow levels while the other was raised up high with a 5cm honeycomb grid and pointed directly at the actor's back. This gave us the slight highlight on his hair which separates him from the dark background in the front CU.
2. The set up for the Christmas scene was very similar to a previous set up in the short film Joanna. Only this time I used a naked 2700K LED bulb wrapped in 1/4 CTO instead of a china ball. This allowed the light to spill around the room and create a more consistent warmth. The reading light highlighting the chair in the background serves as a constant reminder that tough moments can pass. In this situation the reading light adds warmth to the scene, in contrast to it previously representing isolation. The honeycomb grid LED was used as a kicker to separate Hamish from the background and the 2nd LED light was used on the background to increase levels and make the scene more joyful.

2. Hamish Christmas Scene Floor Plan
Elyesse
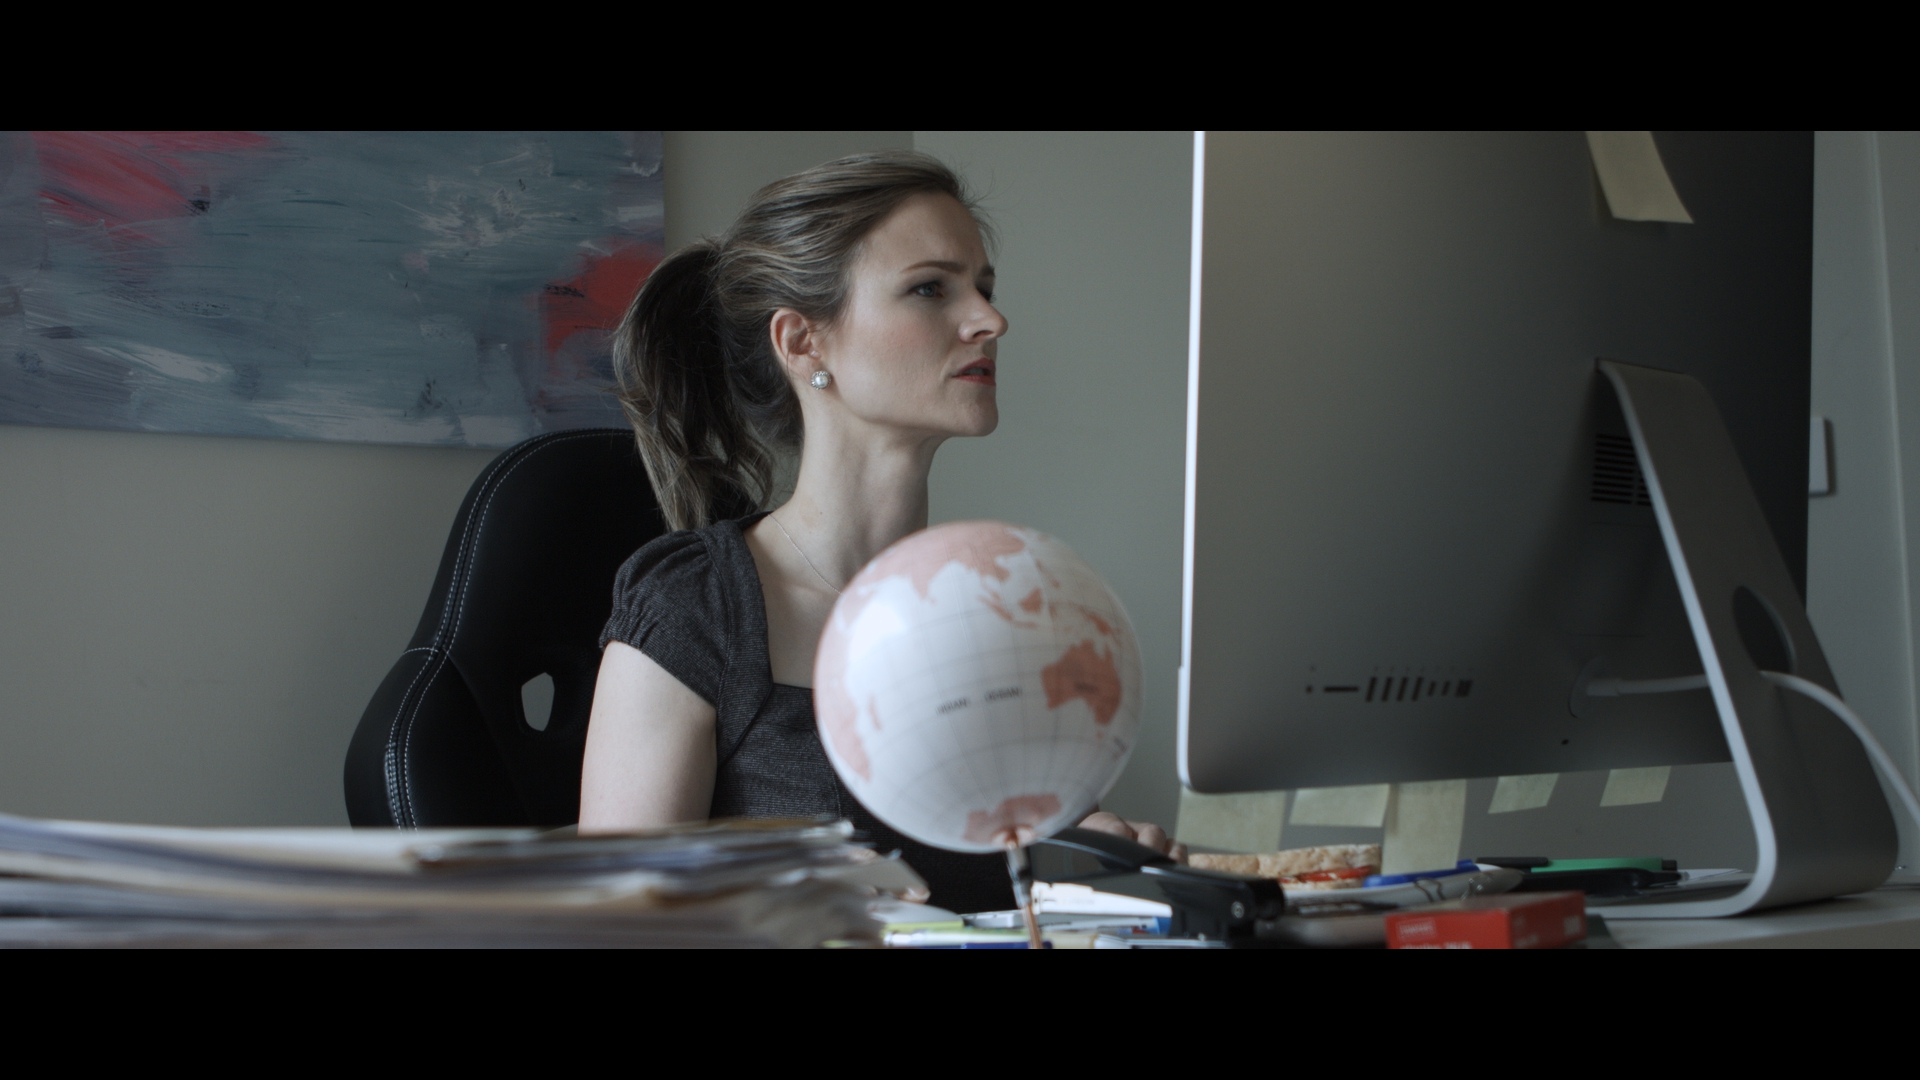


Elyesse's story is probably the most relatable. As a corporate lady she's constantly working without being able to do what she really wants which is to travel the world. Her friendships aren't deep and they feel superficial. This causes her to go home one day and consider slitting her wrists in the bath. With this action in mind, her colour palette was red. The office had splashes of pink, the nightclub was primarily hot red and her bathroom mat was dark red to symbolize the blood if she goes ahead with her decision. The lighting set up was very similar to Neville's which used brighter, available light for the past and softer, moodier light for the present.
The Bathroom

Elyesse walking to the bath

1. Dolly set up

2. The bathroom

3. The Dolly
The bathroom was the only indoor location which I shot using only available light. Above the bathtub was a frosted window which softened the sunlight enough for the perfect ambient I was looking for. You can see in picture 2 that there was already a moody ambient and in post-production I could enhance this mood even more.
For the shot of Elyesse walking to the bath placed the camera on a DSLR car dolly and rolled it on a flat board (picture 3) which was previously a cupboard shelf. The resulting shot is pretty haunting.
David


The Bridge
Filming at the bridge was a huge risk. We had an alternate safer option but we wanted to take things up another level so we decided to film over a freeway. We approached it as a run and gun situation knowing that we could be shut down anytime by not having appropriate licenses as well as being a distraction to motorists on the road. There had to be as little people on the bridge at any one time and to get on and off as soon as possible. Before every shot we rehearsed off the side and restricted ourselves to using only available light. Our main concern was causing an accident if a reflector got blown onto the highway or if people got distracted by a camera and someone looking like they were about to jump. Everything went as planned and we got the shots we needed.

The bedroom
We were very fortunate to find all the locations we needed for David's scene in one house. It was even more amazing that the family that lived there had a blue colour scheme which matched ours for our character. There were blue sofas, pillows, pictures and tissues which tied the whole location together. David's story was the most important as it represented a turning point in the story. We witness how someone who shows that they care can save a life even if its from unexpected sources.


Bedroom Floorplan
I had to shoot day for night in this house and the shots from the bedroom became one of my favourites only after I saw what I could accomplish in post. The set up I had was relatively simple and was a new technique which I hadn't tried before. In my previous shoots I had always shot night scenes by having blue "moonlight" shining into the room. This would result in a blue cast over the image (Whats Left, Joanna) which I considered the "cinematic" style of shooting nights. This time it was a result of the environment which caused me to think differently and find this new technique which I now love.
We were scheduled to shoot this scene in the middle of the afternoon when the sun wouldn't set for another 4 hours and I had to fake day for night as best I could. The blinds were blackout draws which meant that I couldn't diffuse the sunlight through curtains and CTB like I normally do to create my "moonlight". I had to draw them shut and start with a black room. I didn't have enough diffusion to soften the light to point it directly at the actor so I knew that I had to bounce it off the wall. The table lamp was always going to be on and I was happy with it being the key as I knew he was going to be writing by the desk and so I simply used one other LED bounced off the wall to fill the room ambient to a level I was happy with and hoped that it looked like night. It was only in post when I discovered that by pulling down the levels and increasing the contrast that I had stumbled on a look which I found intriguing. The simplicity of the set up, a practical table lamp and one light source was all I needed to make the dramatic image you see above.